To fix MacBook issues after the latest software update, start by restarting in safe mode. This simple step can help identify and resolve various problems. Confirm you have enough storage space and a stable internet connection for updates. If issues persist, consider reinstalling macOS or using Disk Utility to repair your disk. Also, monitor software compatibility and permissions, as they can become mixed after updates. Always back up your data before attempting significant fixes. With these steps, you can begin to troubleshoot and potentially resolve common issues.
Key Takeaways
- Restart your MacBook in safe mode to resolve various issues by loading a minimal macOS version.
- Consider reinstalling macOS if problems persist after trying safe mode and other troubleshooting steps.
- Verify that your MacBook has a stable internet connection for successful update downloads.
- Use Disk Utility to repair the disk before attempting updates again if you encounter installation errors.
- Ensure you have enough storage space (at least 25 GB for macOS Ventura) before installing updates.
MacBook Software Update Issues
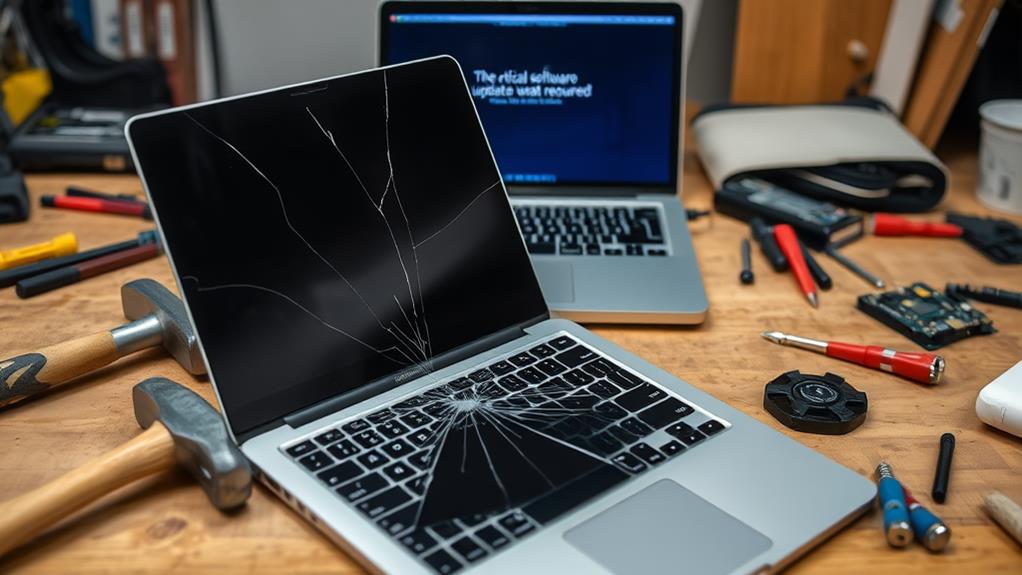
If your MacBook is experiencing issues after a software update, it's essential to identify the root cause of the problem. You might be seeing macbook update notifications that won't go away, or maybe your software download speeds are slower than a snail on a Sunday afternoon. First, try restarting your MacBook in safe mode by pressing the Left Shift Key during restart. This can sometimes resolve the issue, especially if you're getting a "Critical software update required" message. If that doesn't work, you might need to reinstall macOS or use Apple Configurator to restore your MacBook. Additionally, check if you have any deferral restrictions set in Jamf, as this can cause issues with updates. If all else fails, you might need to visit an Apple authorized service provider or try a fresh install from a bootable installation thumb drive. Don't worry, with a little patience and troubleshooting, you'll be back to browsing cat videos in no time.
Resolving Installation Errors
Resolving installation errors after a MacBook software update can be frustrating. But don't worry, we have you taken care of.
First, let's check if your Mac has enough storage space. Your MacBook needs at least 25 GB of free space for macOS Ventura, so verify you have enough space. To do this, click on the Apple menu, then "About This Mac" > Storage. Next, confirm your internet connection as a stable connection is necessary for the update. If your update is still stuck, try installing it in safe mode. This can sometimes fix problematic upgrades. If you encounter an error, check the error logs for more information. This can help you identify the exact problem and find a solution. Additionally, for more severe cases, professional diagnostics might be necessary to identify underlying hardware issues.
If you are still having trouble, you might need to repair your disk. Use Disk Utility to fix any issues, then try updating again. If all else fails, you might need to erase your Mac and reinstall macOS or restore from a backup. This is a more drastic step, but it can sometimes be the only solution.
Fixing Software Compatibility Problems
Fixing software compatibility problems after a MacBook update can be a real pain. First, you need to troubleshoot the software updates to figure out what's going wrong. Start by reinstalling macOS in Safe Mode or from macOS Recovery, and if that doesn't work, try resetting the software update preferences or erasing your Mac and reinstalling macOS.
Troubleshooting Software Updates
Many MacBook users encounter software compatibility problems after installing updates. These issues can be frustrating, especially when you're excited to try out new update features, only to find that your user interface is glitchy or your favorite apps aren't working properly. To avoid these headaches, it's essential to have solid backup methods in place, take advantage of security improvements, and look forward to performance enhancements. In some cases, the update might also lead to hardware issues such as overheating or USB port malfunctions, which might require hardware repair services.
If things go wrong, knowing your restore options can be a lifesaver. Update scheduling and compatibility checks can also help prevent issues. For those who do encounter problems, troubleshooting guides can be your best friend. Here are some tips to get you started:
- Check Your macOS Compatibility: Confirm your Mac model supports the latest update.
- Reset Software Update Preferences: Sometimes, a simple reset can fix update failures.
- Restart in Safe Mode: This can bypass problematic login items or extensions.
- Use Combo Updates: These can sometimes fix issues that regular updates can't.
- Set Date and Time Automatically: This guarantees your Mac syncs properly with Apple servers.
Stay on top of update notifications to address any issues promptly.
Resolving Compatibility Issues
When you encounter software compatibility issues after installing updates on your MacBook, it's essential to identify and address these problems promptly to guarantee your device functions smoothly. Typical issues include user interface glitches, malfunctioning apps, and in some cases, hardware problems like overheating or USB port malfunctions. If your MacBook starts overheating, it could be due to internal component issues exacerbated by the update.
First, check for legacy software that might be causing the issue. If you're running outdated third-party applications, they might not be compatible with the latest macOS. Update these apps or uninstall them if they're no longer supported. Next, review your system preferences to ascertain everything is set correctly. Sometimes, a simple tweak in user settings can resolve the problem.
If the issue persists, consider driver updates or software rollbacks. You might need to revert to a previous version of an app or update your drivers to guarantee compatibility. App incompatibility can also cause problems, so check if any apps are conflicting with each other. Additionally, hardware conflicts and version discrepancies can cause issues. In some cases, you might need to update your firmware to resolve the problem. By addressing these potential issues, you can get your MacBook running smoothly again.
Troubleshooting Performance Glitches
Let's get down to business. To troubleshoot performance glitches on your MacBook, you first need to identify common issues – think system crashes, slow responses, or just plain weird behavior. Start by rebooting your Mac, as this simple trick can resolve a myriad of problems, and if that doesn't work, you might need to dig a bit deeper into system logs or even boot in safe mode to find the culprit.
Identify Common Issues
Identify Common Issues (Troubleshooting Performance Glitches)
Now that you've updated your MacBook, it's time to tackle those pesky performance glitches. You know, the ones that make you wonder if your MacBook has developed a mind of its own. Don't worry, we've got your back!
You might be experiencing slow performance, frequent crashes, or weird screen issues. Yeah, it's frustrating, but don't throw your MacBook out the window just yet. Let's break down the most common issues and how to fix them.
First off, slow performance can be a real drag. It's like your MacBook is stuck in quicksand, and you're the one who has to pull it out. This can be caused by outdated software, a cluttered hard drive, or insufficient RAM. To fix this, try updating your macOS, clearing disk space, or upgrading your RAM. Trust us, it's worth it – you'll be back to multitasking like a pro in no time!
Your user experience should be smooth sailing, not a frustrating rollercoaster ride. So, let's get cracking on those performance enhancements and make your MacBook the ultimate productivity machine. Ready, set, troubleshoot
Resolve System Crashes
System crashes can be particularly frustrating, especially if you were in the middle of an important task. You're stuck wondering what went wrong and how to fix it. Don't worry, we have your back. Here are some common issues that might cause system crashes:
- Software updates gone wrong: Sometimes, a new update can mess with your system, causing it to crash. This is especially true for major updates like macOS 14.0 (Sonoma) and iOS 17.
- Hardware issues: Faulty hardware, like a failing fan or a problematic Touch Bar, can also lead to system crashes.
- Permission problems: After a software update, permissions can get mixed up, causing issues with apps like BetterTouchTool.
To resolve system crashes, try restarting your Mac in safe mode by pressing the Left Shift Key during restart. If that doesn't work, you might need to reinstall macOS or seek professional help. Always make sure to back up your data before attempting any fixes. System recovery can be a real pain, but with the right steps, you'll be back up and running in no time.
Addressing Touch Bar Failures

Frequently, MacBook users encounter Touch Bar failures after a software update, which can greatly hinder their productivity. Don't worry, we have your back. First, try a simple restart. If that doesn't work, let's explore some troubleshooting steps.
Check if any recently installed or updated software is causing the issue and try disabling it. Then, make sure your MacBook Pro is running the latest version of macOS, as outdated software can lead to compatibility issues with the Touch Bar. Also, look out for misconfigured System Preferences or accessibility settings that might interfere with the Touch Bar's functionality.
For more technical issues, you might need to reset the SMC (System Management Controller), which manages power distribution, including to the Touch Bar. You can also try resetting the NVRAM, which stores preferences and settings. If all else fails, it might be time to contact Apple Support for further assistance or consider hardware diagnostics to identify any physical problems.
Software Update Failure Solutions
When your MacBook Pro's Touch Bar stops working after a software update, several steps can help troubleshoot and fix the issue. Don't worry, you're not alone; many users face similar problems. Here are some quick fixes to get your Touch Bar back on track:
- Force Quit Trouble-Causing Apps: Sometimes, a glitchy app can cause your Touch Bar to malfunction. Use the Activity Monitor to identify and force quit any problematic apps.
- Update macOS: Verify your MacBook is running the latest macOS version. Updates often resolve compatibility issues that might affect the Touch Bar.
- Restart Touch Bar: Revitalizing the Touch Bar's memory can help. You can do this by restarting the Touch Bar agent through the Activity Monitor or using Terminal commands.
If these steps don't work, you may need to contemplate more drastic measures like an update rollback or restoring from a backup. Remember, updating your macOS is essential to guarantee your Touch Bar functions properly.
MacBook Restart Issues
Restarting your MacBook can sometimes become a frustrating experience, especially when it refuses to boot properly after a software update. It's like your MacBook is playing a game of hide and seek, and you're the one who's lost. Don't worry, we've got some tricks up our sleeve to help you get your MacBook back on track.
First, let's talk about MacBook hardware checks. You might need to reset the NVRAM or PRAM to solve the issue. To do this, turn off your MacBook, then press and hold the Command + Option + P + R keys while turning it back on. Keep holding those keys for about 20 seconds until you hear the startup sound twice. Release the keys and see if your MacBook is back to normal.
Another issue might be MacBook battery drains. If your MacBook is not turning on after an update, try checking the power and display. Make sure your MacBook is plugged in and the display is working properly. If that doesn't work, try force restarting your MacBook by holding down the Control + Command + Power Button for a few seconds.
Safe Mode Update Fixes
If your MacBook is stuck in a restart loop or refuses to boot properly after a software update, booting it in Safe Mode can be a lifesaver. Safe Mode is a special startup process that loads a minimal version of macOS, bypassing third-party apps and login items that might be causing issues. Here are some update benefits you can expect from booting in Safe Mode:
- Fixes startup issues: Safe Mode can resolve problems that prevent your MacBook from booting properly.
- Identifies problematic apps: By preventing third-party apps from launching at startup, you can identify if an app is causing your MacBook to malfunction.
- Repairs disk issues: Safe Mode can also help repair issues with your startup disk.
To boot your MacBook in Safe Mode, simply restart your Mac and immediately press and hold the Shift key until you see the login window. This will load your MacBook in Safe Mode, where you can troubleshoot and fix issues without the interference of third-party apps.
Critical Software Update Fixes

Fixing critical software update issues on your MacBook can be challenging, but there are specific steps to resolve these problems. First, try booting in Safe Mode by holding the Shift key right after the startup chime and keep it pressed until the boot is complete. This often allows the update to install successfully. If this doesn't work, switch to another internet connection to guarantee a stable download of the update.
Another common issue is peripheral devices interfering with the update process. Unplug all external devices like USB drives, monitors, and SSDs, and then restart your Mac. Additionally, resetting the System Management Controller (SMC) can also help by restoring default settings for low-level functions. For Macs with a T2 chip, press and hold the Power button for about ten seconds, release, wait a few seconds, and then turn it back on.
These steps can help you bypass the "A Critical Software Update is Required for Your Mac" error and enjoy the update benefits without frustration.