When your MacBook's Wi-Fi refuses to cooperate, it's vital to start with the basics. Begin by restarting your Mac, as this often resolves temporary issues. Next, verify your date and time settings are correct, as discrepancies can affect connectivity. Updating macOS is also significant, as new updates often include bug fixes and performance enhancements. If these steps don't work, you'll need to dig deeper. Utilize built-in diagnostic tools to identify network problems, and don't hesitate to reset your network settings for a fresh start. But what if these solutions don't fix the issue? You'll need to explore more advanced troubleshooting methods, and that's where things get interesting.
Key Takeaways
- Restart Your Mac: Automatically renews the IP address and clears temporary files, often resolving connectivity issues.
- Use Diagnostic Tools: Run Wireless Diagnostics to identify and fix Wi-Fi problems, and check Network Recommendations for guidance.
- Reset Network Settings: Forget the Wi-Fi network and reconnect, or delete network configuration files for a deeper reset.
- Update macOS and Router Firmware: Ensure both your MacBook and router have the latest software updates to fix bugs and improve performance.
- Check and Adjust Router Placement: Optimize router location to avoid interference and improve signal strength.
Restart Your Mac
Restart Your Mac
Restarting your Mac is often the simplest and most effective solution for resolving WiFi connectivity issues. It's like hitting the reset button on your life – sometimes you just need to start fresh. When your Mac restarts, it automatically renews the IP address it was assigned when you joined the WiFi network, which can fix a lot of common problems. This method is particularly useful for MacBook Air users who experience frequent software malfunctions.
Think of it like checking your power settings and network preferences all in one go. It's a quick fix that doesn't require you to be a tech wizard. Just shut down your Mac, wait a few seconds, and then turn it back on. This simple action can refresh your WiFi connection and get you back online in no time.
Plus, it's a good chance to give your Mac a little break. It's like telling your Mac, "Hey, take a deep breath and reboot – you're welcome!" So, the next time your WiFi goes haywire, don't sweat it. Just restart your Mac and see if that magic trick works for you. It's worth a shot, right?
Check Date and Time
After restarting your Mac to resolve WiFi connectivity issues, another step to contemplate is checking the date and time settings. Yep, it sounds simple, but it's essential. Incorrect date and time can mess up your Mac's ability to connect to the internet, so make certain these settings are on point. Proper time synchronization is key here, as it guarantees your Mac stays in sync with the world.
To check your date and time, head to System Settings (or System Preferences in older macOS versions) and click General on the left. Then, select Date & Time on the right. If the date and time are off, adjust them accordingly. It's also a good idea to enable Set time zone automatically using current location to keep things accurate. If you're connected to a different Wi-Fi network and the issue persists, it might be worth updating your macOS while on that network.
Update Macos

If your MacBook still can't connect to Wi-Fi after checking the date and time, it's time to confirm your macOS is up to date. Updating your macOS can bring a host of benefits, like fixing bugs, enhancing security, and improving overall performance. Think of it as giving your MacBook a health check and a boost of energy. Additionally, staying updated can prevent future issues such as software corruption that might lead to costly repairs.
To update your macOS, go to the Apple menu and select "System Settings" (or "System Preferences" if you're on an older version). Then, head to "General" and click on "Software Update." If there's an update available, click "Upgrade Now" and let your MacBook do its thing. It's a good idea to update your macOS regularly, as Apple often releases new updates to fix issues and add features.
Updating frequently confirms you have the latest security patches and improvements, making your MacBook more stable and secure. So, take a minute to check for updates—it's like updating your phone, but way more fun because it's your MacBook. If you're already connected to a different network where you can update, use that to your advantage. Once you're all updated, your MacBook should be back to its internet-browsing self in no time.
VPN and Security Software
If your MacBook is connected to WiFi but can't get online, it might be because of your VPN or security software. These tools can sometimes cause conflicts, especially if they're not compatible with your current setup. Try uninstalling your VPN or temporarily disabling it to see if that resolves the issue, and remember, it's not you, it's probably just the software.
VPN Conflict
When your MacBook connects to WiFi but fails to access the internet due to a VPN, it often indicates a conflict between your VPN software and your WiFi network settings. This can be frustrating, especially if you're in the middle of something important. Here's what you can do to solve this issue.
First, check your VPN settings. Sometimes, the VPN can interfere with your network protocols, causing connectivity issues even when you're connected to WiFi. Try disabling your VPN and see if you can access the internet. If this works, you know the VPN is the culprit.
If disabling the VPN doesn't help, consider uninstalling and reinstalling it. This can sometimes reset any problematic settings that might be causing the conflict. Another trick is to create a new network location in your Network Preferences. This can bypass any issues caused by the VPN and get you back online.
Lastly, if you're still stuck, run Apple's built-in Wireless Diagnostics tool. This can help identify and fix any issues with your WiFi connection that might be exacerbated by your VPN. Don't let your VPN turn into a WiFi nemesis – take control and get back online
Security Software Impact
Security software, including VPNs, can substantially impact your MacBook's ability to connect to the internet over WiFi. It's like having a bodyguard who's a bit too protective – sometimes they block the good guys along with the bad. If your WiFi is acting up, it's worth checking if your security software is the culprit. Given that virus removal service can restore your MacBook's speed and safety, it's essential to verify your software settings are appropriately configured.
First, take a look at your VPN settings. Even when it's turned off, some VPNs can still interfere with your WiFi connection. It sounds weird, but it's like that one uncle who just can't help butting in. If you've recently updated your VPN or macOS, it might be a compatibility issue. Try uninstalling the VPN and see if that sorts things out.
Antivirus settings can also cause issues. Some antivirus programs might be overly zealous and block WiFi access. Check your antivirus settings to see if they're set too high. You can temporarily disable it to see if that's the problem. Remember, it's all about finding the right balance – you don't want to leave your MacBook vulnerable, but you also don't want it to be a WiFi hermit.
Use Diagnostic Tools

To troubleshoot Wi-Fi issues on your MacBook, start by utilizing the built-in diagnostic tools. These tools can be a lifesaver when your internet is slower than a snail on valium.
First, let's talk about running Wireless Diagnostics. You can find this tool by holding down the Option key and clicking the Wi-Fi icon in the top right corner of your screen. This will open a menu with the option to "Open Wireless Diagnostics." Click on it and follow the prompts. The tool will scan your network and give you a report on what's going wrong and how to fix it. It's like having a Wi-Fi doctor right in your Mac.
Another handy tool is the WiFi Analyzer, which helps you check signal strength and find the best channels for your router. This can be especially useful if you live in an area with lots of Wi-Fi networks competing for space. Think of it like finding a quiet spot in a noisy cafe to get some work done.
Lastly, if you're still having trouble, you might want to check out the network recommendations under the Control Center in your System Settings. Sometimes, your Mac knows more about what's wrong than you do, and it can offer some pretty useful fixes. So, don't be afraid to let your MacBook do some of the troubleshooting for you. It's here to help
Update Wi-Fi Router
If your MacBook's Wi-Fi issues persist after running diagnostic tools, updating your Wi-Fi router's firmware can be a crucial step. Think of firmware updates as a reboot for your router, but instead of just turning it off and on, you're giving it a fresh set of instructions to work better.
To start, head to your router's administrative settings page. This usually involves typing an IP address into your web browser, like '192.168.0.1' or '192.168.1.1', depending on your router model. Log in, and look for a section that says something like "Firmware Update" or "Router Update." Follow the prompts to download and install the latest firmware.
While you're at it, check your router's placement. Is it tucked away in a corner, surrounded by thick walls or other electronic devices? These can interfere with your Wi-Fi signal, making it weaker. Try moving your router to a more central location, ideally on a high shelf or table.
Updating your router's firmware and adjusting its placement can make a big difference. It's like giving your Wi-Fi a mini-makeover to guarantee it works smoothly. So, take a few minutes to update and rearrange – your MacBook (and your sanity) will thank you.
Try a Different Network

When your MacBook struggles to connect to your home or office Wi-Fi network, trying a different network can help pinpoint the issue. This simple trick can tell you if the problem is with your MacBook or your Wi-Fi network.
Here are some steps to try:
- Connect to a public network: Head to a coffee shop, library, or any other place with public WiFi. This will help you see if your MacBook can connect to a different network without any issues. Just remember to follow public WiFi etiquette, like not accessing sensitive information.
- Use a different router or network: If possible, try connecting to a friend's or family member's Wi-Fi network. This can help you determine if the issue is specific to your current network.
- Check with your ISP: If you're able to connect to other networks but not your own, it's time to check with your internet service provider. They can inform you about any outages or issues with your specific connection.
Reset Network Settings
Resetting your MacBook's network settings can often resolve persistent Wi-Fi connection issues. It's like hitting the reset button on your Wi-Fi life, giving your MacBook a fresh start.
How to Reset Your MacBook's Network Settings
There are two main ways to do this, and we'll walk you through both.
Method 1: Forget Your Network
- Click the Wi-Fi icon in your menu bar.
- Select your Wi-Fi network and then click on "Details."
- Choose "Forget This Network" and confirm the deletion.
- Re-add your Wi-Fi connection from the Wi-Fi menu.
Method 2: Delete Network Configuration Files
This method is a bit more involved but can be super effective.
| Step | Action | Location |
|---|---|---|
| 1 | Turn off Wi-Fi and shut down browsers | System Settings > Network > Wi-Fi |
| 2 | Open the 'SystemConfiguration' folder | Apple menu > Go > Go to Folder > '/Library/Preferences/SystemConfiguration/' |
| 3 | Delete specific files (e.g., 'preferences.plist', 'com.apple.wifi.message-tracer.plist') | Move files to a new folder on your Desktop |
| 4 | Restart your Mac and reconfigure Wi-Fi | System Settings > Network > Wi-Fi |
Check for Hardware Issues

Your MacBook's Wi-Fi problems might not always be software-related; sometimes, the issue lies with the hardware. If you've tried all the software fixes and your Wi-Fi still isn't working, it's time to dig deeper.
Here are some steps to check for hardware issues:
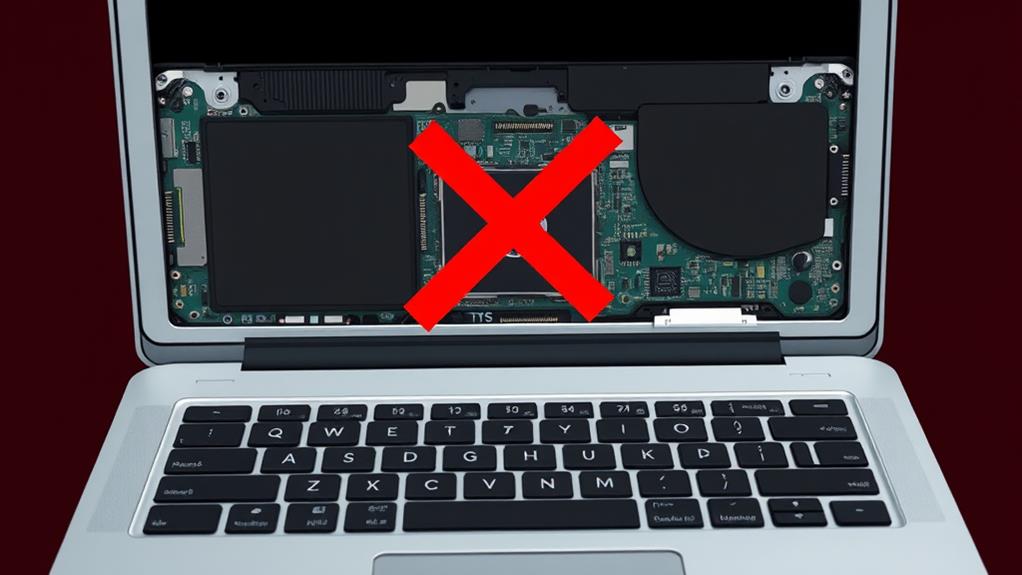
- Check for WiFi Antenna Problems: If your MacBook's WiFi antenna is damaged, you won't get any signal. This can happen if you've dropped your MacBook or if the antenna got bent. You might need to take it to a repair shop to fix this.
- Run Hardware Diagnostics: Your MacBook has built-in diagnostic tools that can help identify hardware issues. To check for hardware problems, restart your MacBook and immediately hold down the 'D' key. This will take you to the Diagnostic Tool, which will run tests on your hardware.
- System Report: Go to the Apple menu, select "About This Mac," then click "System Report" and look for the "Wi-Fi" section. If macOS doesn't see the Wi-Fi adapter, it might be a hardware failure, and you'll need professional help.
Contact ISP or Network Administrator
If your MacBook's Wi-Fi issues persist despite trying software fixes, it's essential to verify that your internet service provider (ISP) or network administrator is not experiencing any outages or issues. Think of it like calling the cable company because your TV isn't working: sometimes the problem isn't your equipment, but the service itself.
Start by checking if other devices in your home or office can connect to the internet. If they can't, it's likely an ISP problem. Contact your ISP to see if there's an outage or any network configuration issues on their end. They might be able to send a technician to fix the problem or provide guidance on troubleshooting techniques specific to your situation.
If other devices are working fine, but yours isn't, it's still a good idea to talk to your ISP or network administrator. They can help you figure out if there's a problem with your specific connection or if there's something weird going on with your network setup. Remember, sometimes the simplest solutions come from asking the right people the right questions. So, don't be afraid to reach out and get some professional help to get your MacBook back online.


